Our bathroom renovation - before and after

Almost a year to the date we ripped out our old bathroom (I excel at taking my sweet time doing things), I'm finally showing you the after! I'm making this a two-part post because I really want to share with you some tips and things I learnt from the reno and if I can dig out the receipts, I can tell you exactly what it cost too! I'd be curious as to what you think it cost if anyone is keen to guess a ballpark.

When we bought this house, we knew we'd never move the bathroom, but eventually add another. The original bathroom just housed a shower, bath and vanity - the toilet was in the laundry. It was old, original and rotten in parts - it was awful to shower in (a large percentage of tiles had broken and fallen away); awful to bathe in (slow to fill; gross and rough base) and awful to be in. Here it is just after we moved in!

It's just so attractive, isn't it? When it came to renovating it, we worked with the space we had. Steve had just three requests: a great rain-style showerhead; a bath that was quick to fill and a toilet roll holder that was vertical so the roll wouldn't fall off. I was (happily!) left to nut out the details: I wanted something clean and simple, light and white. The space needed to squeeze in a decent-sized vanity with benchspace, a bath, a shower, a toilet, great storage, a laundry baskey, kids stool for reaching the vanity (which we still don't actually have, but do have the space for!) and towel hanging space for six people. Seems like a lot of requests for a tiny space, but we managed to get it all in and even ended up with a fair bit of free space which was a nice. Not quite enough to swing a cat, but maybe a kitten!


The only main structural change to this space was ripping out the tiny, useless pantry that was opened from the kitchen and replacing it with built-in open shelving. Originally, I figured we'd just use the space that was there and just have a very narrow, tall shelf but the builder said he had to rip it all out anyway so we could choose our widths and heights of the shelf. In order to fit a toilet in (I chose the smallest I could find that wasn't plastic), we had to put the shower over the bath - not a major problem, but it'd have been nice to have two separate utilities and I've always wanted a freestanding bath, but it wasn't to be...

As for looks, subway tile was always going to feature - I know many who don't like it, but when it's white tile and white grout, I'm happy. I don't like it any other way. I wanted a dark grey floor that matched my whitewashed floors, chunky built-in shelving, at least one tiled display shelf in the shower, a frameless glass shower screen that swivelled and a wall-hung vanity to avoid water damage from the floor (every old bathroom I've ever had the pleasure of living with had water damage to the bottom of the vanity!) and nice-looking taps. Here's what we ended up with:


The only thing I'd maybe do differently is the tiled lip around the bath edge. Water sits here and stains the grout easily. I don't know what else we should have done, but I'd probably have looked into it more if I'd known that would happen!


The wall-hung vanity has enough space to clean underneath easily and because it's off the floor, tricks you into thinking it's smaller than it looks. But it's a good size - the cupboard houses a hairdryer, straightener, clippers, soaps, toothpaste, extra toiletries. I'm also so pleased the handles are the built-in variety (Steve's choice - he done good!) because I am pretty sure everyone's knees and thighs would have been corked several on any handles sticking out! We deliberately stopped the tile at that height on this wall and the opposite wall - there was no reason to continue it to the ceiling like it is in the shower. It's also decision made by budget - it would have cost several hundred dollars more to tile the whole wall. I think I made it one row too high (the kids can't see themselves yet! But they'll grow!) but it's a minor, minor oops. We could choose where we wanted to place the basin and I deliberately chose to the right to allow for maximum benchspace and also I thought it might have felt a little cramped being so close to the door. I'm still planning to add a fence-paling frame around the mirror. One day!

I had these taps picked out before anything else in my bathroom. But I struggled to find a vanity I liked that had three holes - they all had one hole for a mixer tap. But I don't like mixer taps in the bathroom - especially in the bath/shower because the kids can bump them so easily and are highly likely to play with it because it's easy to do so! I also didn't want to do two different tap styles so I spoke to the plumber and we decided to mount them on the wall over an above-sink basin with no hole! I think it turned out for the best!


The drawers have more than enough room for my minimal amount of cosmetics, sunscreen, and other bits and bobs (I've come a long way from my days at Cosmopolitan magazine where I had boxes full of skincare and cosmetics from our beauty sales! And I hardly used any of it!)


Towel hooks were the only way we'd get enough hanging space for everyone, but even then I had to cut the number of hooks on the wall back to three instead of four (didn't want them hanging over the loo!) There are two more on the back of the door - Steve likes to hang his towel over the shower screen so we all still get a hook each! Soon, we'll have an ensuite and it'll be the kids bathroom, so plenty of space for just the four of them.


Just quietly, I also like the look of towels hanging on hooks rather than on towel rails. It's always nice when aesthetics are a by-product of practicality! I've had these flower towels (from Le Souk) for about six years and they're still in good nick. The grey Turkish towel is from a new local shop called Honey I'm Home.


My nice chunky built-in shelves. I'm so glad they're here - when we knocked through the other side of the house for the kitchen, we removed the only linen cupboard. With no built-in wardrobes and minimal kitchen space, this is the only other storage space in the house. So the top shelf houses sheets and pillowcases (extra doonas, pillows and blankets are in the cabin). Next is towel storage - all rolled up! Then there is a wire basket for toilet paper, bubble bath and nappy-rash creams, cotton wool and cleaning products (it's a Kmart basket I spraypainted black). Behind the basket is more toilet paper and tissue boxes; to the side is hand towels and face washers. Lastly, a laundry hamper slides into the space perfectly for dirty clothes (though it is SUCH a battle getting those kids to put their clothes into it!). Looking out into the kitchen - notice my half-done floor? This is how it's staying until we extend - the floor needs to be continued for a little bit in the dining room and I am NOT doing it now and then redoing it in a few months time! So all painting of ceilings/walls/floors and architraves in that area has ground to a halt!


The wire basket and laundry hamper are both from Kmart. Can't go wrong with black (well, the wire basket was silver, but I painted it!)

Inside the basket - baby/kids shampoo and bubble bath/oils, tub scrub, cotton wool and loo paper. We don't need or use a lot of stuff around here. I'll let you know how that changes when my girls become teenagers! Eek!
  
Towels always look better rolled up. Our beach towels go here too, but were (conveniently!) line-drying after swimming when I took these pics.
 

The nook! It's at the other end of the shower. I thought I'd use it for shampoo and conditioner storage, but they go on the windowsill and instead I usually display some greenery from our walks in a tiny bottle, a candle and usually my all-purpose mint spray. For these pics I switched it up with the first agapanthus to bloom in my garden!

That's about it! I'll write a little bathroom renovation guide in coming days for those who could do with some tricks and tips! I'm trying to work out the look of our ensuite bathroom in our loft, I can't imagine me veering too far from this kind of look. I'm a bit of a one-trick pony! But really, I can't see this going out of style quickly - there is nothing trendy here that will date. Plus there aren't too many patterns or colours or shapes or... stuff! No need to be tricky for the sake of it or for the sake of a DIY project. Pretty and practical has always been my mantra...x

Sources:
Taps: Mondella Resonance Chrome bath set, $75, Bunnings
Vanity: benchtop (Quantum Quartz in Alpine White), basin: (Siato above-counter basin) and vanirt (BTH Noah Wall WF-900 vanity), $620 for all three, Eagles Plumbing
Floor tiles: Bellazza floor tile in Mystic Granite, $10.45 for a box of 11, Bunnings
Wall tiles: Johnson Waringa White subway tile, 58c each, Bunnings
Showerhead: Estilo Round shower head, $29, Bunnings
Toilet roll holder: Caroma Cosmo Chrome toilet roll holder, $25, Bunnings


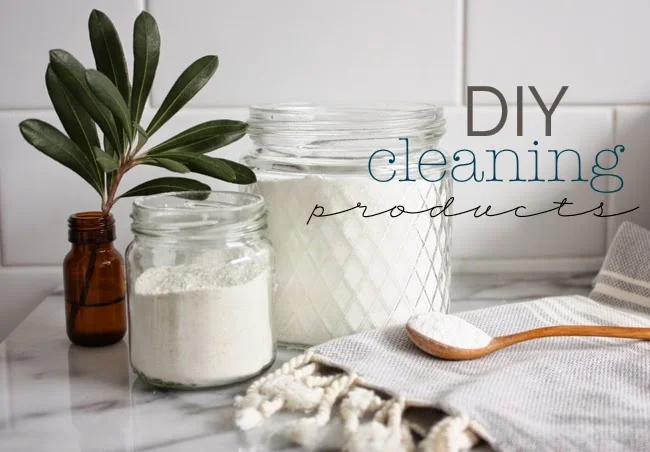
DIY cleaning products (that work better than anything I've bought)
cleaning .jpg

Sit down. I have to tell you something. All of a sudden, I enjoy cleaning. I also am starting to despise any kind of mess and am obsessed with decluttering. Living more simply seems to be where we're heading, but that's a whole other post. This one is still about that first bomb I dropped. I enjoy cleaning. WHO AM I? I am now clearly related to my clean-freak sister Kristie and equally neat Aunty Norma. Ok, I'm not that clean and tidy yet, but baby steps... Anyway, it started innocently enough - the dishes I'd leave in the sink overnight unwashed (YES. I did that. Eww) were nowhere to be seen. In fact, if the kitchen didn't sparkle before I went to bed, the next morning would just start bad and the whole day would go downhill from there. The three baskets of laundry that would overflow for a week and be tipped out onto the floor numerous times a day to find Zak's sock's pair or Immy's undies reduced to one basket that is almost always empty because I had this novel idea to put the washing away as soon as I grabbed it off the line. The shower is scrubbed every few days; the toilet daily, I vacuum several times a week and enjoy smacking the shizz out of my rug outside with Zak's plastic baseball bat (I hang it over the swing set and get so much enjoyment out of that - take out all frustration. I even let the kids at it. Layla is particularly good at whacking it). I've even ordered some old-fashioned wooden cleaning brushes to really get into the zone. In short. I enjoy cleaning. So much so, I'd look up DIY cleaning products on Pinterest while nursing Annika. I am SUCH a social butterfly...

Everyone knows the genius of baking soda, vinegar and lemon. I've tried the usual combinations before but always felt they lacked something (and not just a decent scent!) and for a while I even did the incredible great pairing of bleach and baking soda. Hardly good for anyone - and even then, the bath stains remained and the soap scum on the shower glass refused to budge. But now, I'm happy to have found some great recipes that are pretty easy to make and actually work. Not just work, but work better than anything I've bought at the store. Not even exaggerating. And because I made them myself, I could make the packing pretty too. So I dug out some old jars and repurposed an empty Murchison-Hume into the new mint all-purpose spray, which by the way, is genius.

So far I've made the all-purpose cleaner, a tub scrub, a laundry powder and a not-so-successful (but only because it wouldn't fit through the spray nozzle) stain remover. (If I master that one, I'll let you know.) My house and laundry are smelling so scrumptious lately, I had to share with you too. 

LAVENDER WASHING POWDER

*

Since moving out of home, the only washing powder Steve (and the kids) didn't have a reaction to was Omo Sensitive and the Eco Store powder. Everything else? Eczema breakouts and if I ever added any kind of softener? Rashes and allergic reactions. So to be perfectly honest, I was not expecting this to go anywhere, but they haven't had any reactions at all, which is brilliant because it smells so yummy, cleans so well and makes everything it washes feel good, clean and fresh. The original recipe I copied called for unscented soap, but I figured rather than adding essential oils, I could use the scented soap instead - that way, I can mix it up and try different "flavours" next time without having to spring for more essentials oils (I want to try peppermint next!)

You'll need:

1 bar Castile soap

(I used Dr Bronner's Pure Castile soap in Lavender)

1 cup Borax

(from the laundry aisle of the supermarket - Coles had it; Woollies didn't)

1 cup Washing Soda

(also from laundry aisle - not to be confused with baking soda. In my searches I've discovered you can make washing soda by baking the baking soda in a try in your oven. Baking it removes one of the carbonates, meaning it's no longer bi-carbonate soda, but carbonate soda, which is washing soda. Sheesh, I am such an expert on these things now).

How to:

1.

Grate your bar of soap into a bowl. The kids can - and will want to - help you with this. It is unavoidable if they are around. Just let them, a little grated skin is not going to harm your clothes! Ha!

2.

Add the Borax and Washing soda.

3.

The original recipe just required you to mix it together (you could add a few drops of essential oils if you used unscented soap, or if you wanted to pair to scents - I'd imagine vanilla and lavender would be a nice combination). After stirring it looked a bit too chunky for my liking. I only use cold water in my machine and wasn't sure the soap would dissolve so well. So i put a few batches of it through the Baby Bullet (a coffee grinder or good blender should also do the trick) and used the milling blade. It totally dissolved the grated soap and turned it into total powder. It looks like store bought stuff. 

4.

Place in a container of your choice. At first I put it back into an Omo container I had - it filled it about three quarters of the way. But then to pretty it up, I made good use of this jar I had in the back of my cupboard.

5.

Use one tablespoon of powder per load. I use two scoops of this wooden spoon.

PEPPERMINT ALL-PURPOSE SPRAY

**

I'm really shocked at how well this worked. Normally, trying to get rid of marks on the bath involved spraying with whatever bleach-ish spray I had and watching it streak the bath and not actually come away when I scrubbed it. This sprays on, scrubs off beautifully and leaves it looking brand new again (my bath is not even a year old yet so kinda new anyway but it has been grubby and this clears it right up). I use it on the counter, the loo, the tiles, the shower screen... It hasn't come out of the bathroom yet, but I might make a different scent for the kitchen...

You'll need:

A spray bottle

Liquid castile soap (I used Dr. Bronner's Liquid Castile Soap in Peppermint)

Water

Tea Tree Oil

How to:

Add two tablespoons of castile soap to each cup of water. Add a few drops of tea tree oil to the mix. Then shake and spray!

ORANGE TUB SCRUB

**

Ever wondered if ever there was a way to recycle your egg shells? Well stop! There is! Apparently, egg shells all ground up is basically calcium powder, which you can take as a supplement (I'd read up more on this before doing so though) or use to scrub your bathtub super-clean! Think of it as the cleaning regime's equivalent of an exfoliator. The finely ground shells are still gritty enough to scrub away at the surface, removing stains and grime. Plus it smells heavenly.

You'll need:

Egg shells - I used about a dozen and a half.

Baking soda (bi-carbonate soda). I used the same volume as whatever the eggshells made up.

20 drops of orange essential oil

How to:

1.

Collect your shells over a couple of weeks. I rinsed as I used them, then left in a container. When you're ready, place in a pot of boiling water on the stovetop and boil for around 10 to 15 minutes. Remove and lie on a tray and leave to fully dry - I left them in the sun, overnight and again in the sun for a few hours before crushing.

2.

In smallish batches, I gently broke them up a little more and placed in the baby bullet (a food processor or coffee grinder would also work). Using the milling blade, I blended until the shells were basically obliterated. It turned to powder. 

3.

Once all the shells were now calcium powder, I placed in a jar and added an equal part of baking soda (bi-carbonate soda). 

4.

Shake the jar until blended. Add your essential oil around five drops at a time, mix with the handle of a small spoon until all mixed up and no lumps!

5.

Use a small spoon or your fingers to sprinkle onto the surface you want to scrub. I sprinkle onto a wet sink or bath and scrub away, adding more water as I need to. 

And there you have it! Three easy to make cleaners that make your home smell sooooo good. And not a vinegar bottle in sight. (Though my next experiment is a vinegar-based floor wash with essential oils...) I'd love to hear your own stories of using homemade products - I was pretty skeptical a while back when the vinegar/bi-carb thing didn't work. But these versions - and the castile soap - seem to be the right mix. I'm keen to try more - disinfectant, dishwashing tablets.... What worked for you?! 

And in the interest of keeping things real, here is how my bathroom looked while shooting the pics. The sink kept casting a shadow on the bottles, so I raised them with a marble board! Books to the rescue again!

Turkish towel and wooden spoon, Honey I'm Home (local store); Marble tray from Aldi; diamond jar from Hot Dollar (I think); tiny brown vase is a baby panadol bottle; brown spray bottle, Muchison Hume.

* My adaptation of

this recipe

from

Step Into My Green World

** My adaptations of the recipes from

Little Green Notebook

The cubby house that love (and lots of recycled timber) built - progress report


 Just to keep with our current trend of taking forever to finish things, here is a peek at another unfinished and s-l-o-w going project: a cubby for the kids. Just like last time, we decided to make it ourselves out of as much recycled timber as we could. So aside from buying the concrete, the saddles (? those metal things you put in the concrete for the main structural beams to sit in), and a few pieces of timber for the main frame, we've pretty much created a hodgepodge cubby house out of scrap materials we've found in various places. We've used bits left over from our own renovation, we've picked up fences people were throwing away, have raided council clean-up piles for long lengths of flattish wood for cladding and stolen bits and bobs from our families. One neighbour gave us his old architraves and skirting boards; the other neighbour donated old gates. An eBay slippery dip that just cost us petrol money to get was erected to one side; a found old timber ladder is screwed to the wall to allow the kids to climb to that platform for the slippery dip or the pole from our front porch that is now a fireman's pole. A tyre we rescued from the water was strung up off the small pergola and tied with rope from our boat's old anchor which is still at the bottom of the sea after getting stuck one day and being cut loose. We're planning to paint coloured polka dots on the tyre for fun and spray paint the pole in rainbow stripes using the stupid amount of paint I've stockpiled in recent years. 


This weekend just gone, we finally got around to laying the floor. Well Steve laid the floor. I helped  with the measuring then took one of our many children to one of many parties that they get invited to (all those estimates on what it costs to raise children? Do they include all the presents for their friends you're meant to purchase over their childhood as well? Cause those things add up!). Anyway the floor is a very uneven mismatched surface made from two different gates from next door. The panels were different widths, thicknesses and some had weird ridges so it's certainly not the smoothest floor going around, but they can stand on it and play. A lack of a roof and interior walls did nothing to stop the kids from moving in yesterday - Zak even hung a picture or two...


Even the broom and timber rocking chair were roadside finds (I scored a mid-century extendable teak dining table yesterday too. Yay!) and the chandelier was given to us by a neighbour at our old house for our first cubby.)


We thought about leaving the walls as is on the inside - the kids use the studs as shelves! - but they can also push out the cladding and some of the other walls are scarily hideous with all sorts of random bits of wood. No carpenter is ever allowed near our cubby!


Today I mixed up a bunch of black and grey paints I had leftover and gave the floor its first coat (it had a bit of a sanding yesterday). As soon as it was dry, off they went, dragging half the house in there with them and stayed out until after the sun went down.


Seeing as the finish line is in sight and they are so keen to play in there, I think we'll get a move on to finish it off. Famous last words! But tomorrow we'll paint the door (I said the kids could help - God help me) and I think some curtains are in order, solar fairy or cafe lights (seeing as the roof will again be clear - they should work well here!) for nighttime playing, and some scrap-fabric cushions and cheapie rug. So far it's been used as a shop, a tap-dancing stage, a house, a school, a movie theatre, a weapons storage bunker and general hang out spot. Tt was perfect timing getting that floor down in time for the holidays - yay!

This little house has been nicknamed "The Grubby House" (The Graham Cubby House). The previous one was "The Grugly House" (The Graham's Ugly House). I think this one might be slightly uglier, but we needed a new name so Grubby House it is. And oh boy, will it get grubby with my lot! It's going to cop a beating this cubby, which is kinda the point. x
Surprise Thursdays
1000w.jpg

Just before the last school holidays, we spontaneously started a new weekly tradition: Surprise Thursdays. Basically, it is exactly what it says - a surprise that occurs on a Thursday afternoon after school (during term; any time of day in the holidays). It can be anything from a milkshake in a cafe or being let loose in a lolly shop with $5 each to exploring a place we've never been before or paying a visit to family or friends

. It's become something I wasn't sure would last, but the kids LOVE it and have not forgotten at all - they don't even allow their friends over or invite themselves to their friend's house on Thursdays because they know they'll miss out! The downside is now being tied to coming up with something different every week! Luckily, there is the fall back of a great park or McDonald's McFlurry if I get really desperate!

It all started one Thursday when I was driving past a train station. Immy noticed the stairs on the overpass and wondered what was at the top and what could you see. I told her maybe one day we could find out, so when we picked the bigger kids up from school that afternoon, I just drove straight there without telling them anything. They were pretty chuffed (to walk up and down stairs at a train station - my kids are obviously easily amused!) about the surprise and we looked out over the water, counted the steps up and down, found some recognisable landmarks and then headed over to the park we spotted from the top. Around the corner from the park was a little reserve and the kids just had so much fun climbing in the trees, helping Zak out of the mud, messing up a very neat pile of autumn leaves someone had obviously raked up and just running around in the cool afternoon air having fun and being children. So, together with my desire to see more of my own area, I figured we'd continue it every week.

Some of the other things we've done is ...

- Explored the local mangroves and found a tyre swing

- A 

treasure hunt and gather 

at Pearl Beach

- Due to everyone being sick and then the death of my Nana, the kids missed out on their cousin catch-up during the holidays so one Thursday I drove past the school and took them down to Sydney to my sister's house where they got to meet their new baby cousin Harry for the first time and hang out with their Oma (my mum), aunties and cousins. I don't usually let them take days off for no reason, but this was thoroughly enjoyed by all - especially my mum who needed the cheering up and cuddles.

- A party afternoon tea at home complete with balloons, party poppers and cake. I'd planned for all their friends to also come, but I wasn't feeling very well so postponed them for another day. The good thing about cancelling a playdate that the kids didn't know about is NO WHINING! Hopefully we'll get to do that complete with party games in the next few weeks.

And today, we visited a really old cemetery at Point Frederick (below). Called Pioneer Park, it's the resting place of 497 people buried between 1840 and 1953 - and what a resting place! Surrounded by the beautiful Brisbane Water. We didn't stay long because of the rain, but we admired the beautiful craftsmanship of the tombstones, looked for the oldest stone (1843 was the earliest we saw) and felt sad at the grave of a little girl Zak's age. We looked for flowers to pick and place on the stones, but the rain forced us back to the car before we could really explore or check out the paths that led

Time Team

....

down to the water. I imagine it'd be an eerily beautiful place in Spring and apparently is a popular picnic spot (?). But I guess that's nothing compared to what Layla suggested we do when she found out we were checking out a place filled with passed people: "Can we dig them up?" My kids watch too much 

I love the council's commitment to preserving this site. Many of the tombstones are no longer readable, so little plaques have been placed in front of them with the details for when the stones' inscriptions are no more...

So that is our new tradition! At the risk of running out of ideas, I'm going to get the kids to come up with a bunch of suggestions themselves and I'll put them into a hat and draw one out whenever I get stuck. That way, it's still a surprise of sorts. Or maybe I'll surprise them with NO surprise! But then I'd never hear the end of it! As tricky as it may turn out to be, I'm going to keep at it - they really look forward to their Surprise Thursdays - Layla even spoke about it at her public speaking competition. So if you ever want a bribe for your kids, try it yourself! Or if you have any great suggestions for a surprise, please let me know. x

Book week: clone trooper and alice in wonderland + fruit critters


It was somewhere between soldiering on, sewing an apron despite my 30-odd-year-old sewing machine smoking and crackling (from dust, apparently) and paper mache-ing a Clone Trooper helmet that I realised something: I've become THAT mother. The over-the-top over-achiever. Ooops. The kids' Book Week parade was today and we went all out! 


A few weeks ago they told me what they wanted to be: Alice in Wonderland and a Clone Trooper from Star Wars. Layla was relatively easy - I just made a circle skirt and apron (both very ill-fitting - I'm not a great sewer; I basically just sew costumes so they're only ever designed to stay together for one day!) and stuck a black velvet ribbon onto a headband - she had the rest of the items. But I did forget to puff up the sleeves of the blue shirt and it bugged me all day! 


Zak's costume wasn't quite as easy!  I'd been collecting cereal boxes and other small snacky boxes for a while - they're the perfect thickness for making sharp folds the armour needs. Last week I started putting it altogether. I found a good pic on Google images and just started making some pieces. Elastic stapled or tied to the cardboard meant he could slip them on and off easily and they'd stay put. The chest plate and belt were made of a thicker cardboard box, hot glue gunned together and then everything was painted white. I did plan to spray paint it white but chose the cheapest paint in the shop (who wants to use the good stuff on a costume?). That was a waste - the cardboard soaked up all the paint; it was quite the vanishing trick! So I ended up using the remnants of our bathroom paint and hand painted it on - it didn't take long at all to do and it dried really quickly near the heater.


The helmet was another story - I blew up a balloon, sat it inside a strip of cardboard stapled into a circle and papier mached the whole thing. When it was dry, I popped the balloon (and prayed it fit Zak's head as it was done while he was asleep!) Then I had to add to it to create the "bill" at the front - it was really just trial and error and I just kept adding folded up or rolled up bits of newspaper soaked in papier mache glue to build up the sides. I did a few layers at a time, then would blow dry or leave it to dry overnight or in the sun (this was obviously over a few days!) Finally, I painted it, cut out the eye hole (cut it too high, hence the black strip of cardboard covering it at the top a bit!) and drew on a few markings with a Sharpie. Done! Here are some in-progress pics!


To top it off, I spray painted a water pistol we had black and he was all done! He looked so great - yes, it was a lot of work but Zak is pretty funny about dress-ups - he's not that keen normally and often pulls out at the last minute joining in the parade. But he kept on and on about this costume SO MUCH that I couldn't disappoint him. You should have seen how excited he got with each new piece I made - he'd try it on and act out the part. So cute. He also hates having his photo taken, but this morning didn't complain once when I picked up the camera - he was quite the little actor!! So to see him so chuffed was worth every second of working on it! Plus, the helmet looks cool in his room and I have no doubt the costume will be worn again and again until it falls apart!


The torrential rain this morning had we worried he would "melt" before we even got to school, but the rain stopped and the sun came out just long enough for them to get to class, then poured down again, and stopped for the parade - thanks Mother Nature! Here is one more, with Immy, who is ... herself! 


 The school also held a fruit and vegetable creation competition recently. Despite it being a bit of a waste of food (although you could take it back if you wished; or it went to the chickens), we gave it a go using what we had at home already and kept it minimal.

Layla's stage had to make a critter and she wanted to do a ladybug, so I suggested an apple body with sultana spots - she came up with seeds for eyes and the cherry stalks as antennae. I cut the apple for her and she put the rest of it together - sticking the eyes on with Vegemite (of course!). She came third place for her efforts - a pretty darn good job considering some of the other entries. But I was told later she was chosen because it was obvious she had created it herself - clearly some of the other entries hadn't even been touched by a child! It's also a great little afternoon snack with a difference!


Zak's year had to create a monster and he came up with this guy all by himself - I just cut the mouth. The teeth and fingers are the inside of beans and the eyes and hands are cherry tomatoes with peas as eyes. He's pretty cute and looks like he wants a hug! Ha!


I'm proud of their creativity and involvement in school activities. And I'm so grateful I'm able to go to these things - I remember my own book parades and Easter Hat parades and working with mum on my hats and costumes. And I remember how much fun I had - I hope my kids remember too!