Posts tagged kids spaces
Before & after: roadside dresser
dresser before and after 4.jpg

For anyone who has read my blog for years (thank you!), follows me on social media (yay!) or knows me in real life (hi!), you'll know I love a good roadside find. In our part of the world, the local council allows each household six council clean-up piles every year, which means every week anyone who's had a big declutter piles all their discarded goodies onto the roadside just waiting for me to come and save them before the big bad rubbish truck comes early Tuesday morning. I'll show you some of my fab finds in a later post, but for now, here is my latest junk transformation. 

dresser before and after 5.jpg

I drove past this guy one afternoon with a carload of kids. I gave it a quick check over: no damage, nice and solid, great shape, loads of potential. It had a large mirror attached to the top by two large rods but they were simply screwed into the back of the dresser so were easily removed. I just needed the right screwdriver. So a few car trips, few less kids, few extra tools and a whole lot of magic car packing later and it was safely home ready for a little love. Before it got that transformative love, though, it got a whole lot of kids-playing-schools love. In the middle of the living room!

dresser before and after 1.jpg

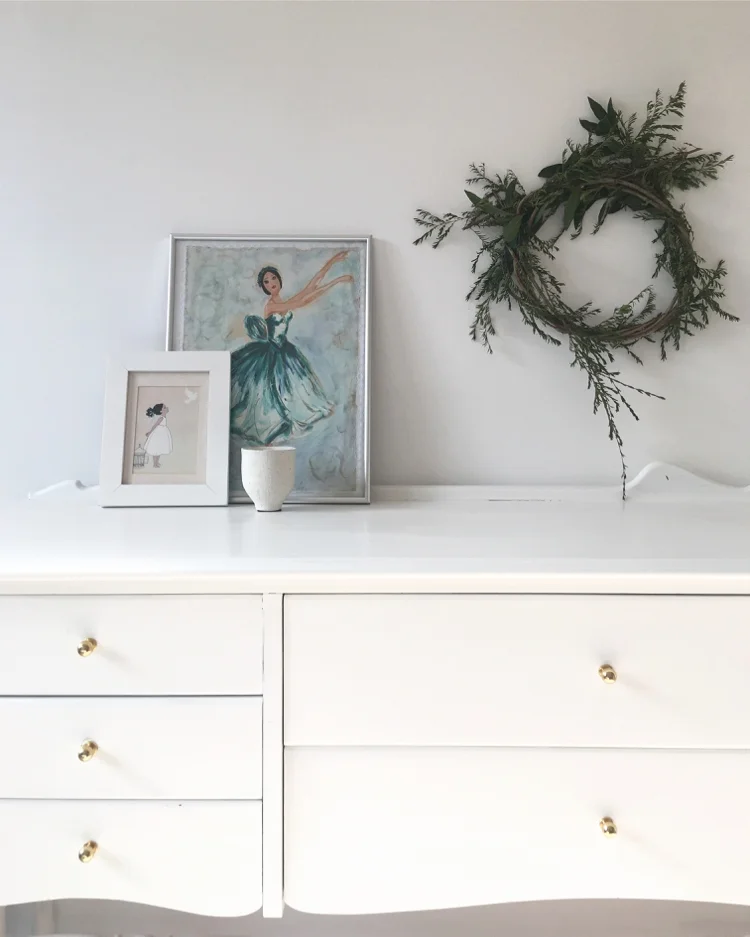
Layla had claimed it as her own as soon as we saw it, so I asked her what colour she wanted it as we were about to finish renovating her room and actually decorate it. White. I don't know, but I think she could be my child! So I sanded it back, primed it and gave it around three thick coats of SolarGuard in semi-gloss (TIP: I always use outdoor semi-gloss on my indoor trim and furniture. If it can handle the weather outdoors, it can surely handle my kids inside!) I finished it off with some tiny gold handles from Bunnings for $2.60 each - they're like little earrings and I think they're perfectly dainty and feminine for the pretty shape of the piece.

dresser before and after 3.jpg

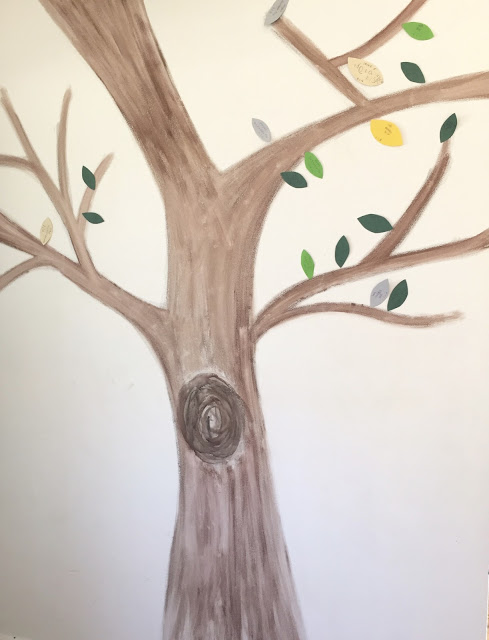
We moved it into Layla's room where it acts as a dresser for her bits and bobs but also a desk when she wants to draw and I kick her out of the kitchen. It happens. We're still to add a shelf and cork board/pictures above it, but for now it's home to a picture my mum painted when she was about 12. We made the wreath at our friend's Harvest Market a few months back. It's still in that same spot, albeit a little less green and healthy-looking! 

Kids craft DIY: nature-walk dreamcatcher

As babies, my kids were hopeless sleepers. Annika is just two and maybe not officially a baby (when ARE you officially not a baby?!) but she still is a hopeless sleeper. As in wakes-up-every-hour kinda hopeless. And only-sleeps-while-being-breastfed-to-sleep kinda hopeless. It's exhausting. When they reach three-ish and finally get how bedtime and sleep works, I do anything in my power to keep it that way. So when the bad dreams start or the night-waking becomes a regular occurrence, we jump on it - with cuddles, bribes to go back to bed... and dreamcatchers. New ones every now and then seem to do the trick - it must be a mental thing?! The kids like to help make them, so we have made a few different ones with various bits and pieces such as fluoro string, beads, buttons, shells, crystals etc. Zak asked for one the other day after having a bad dream, so I told him we'd try and make it just from things we find on a nature walk. So we grabbed a long vine-like length from a plant down the road for the hoop, chose a few feathers from the waterfront and a shell with a natural hole in it for the centrepiece. The only thing we didn't find was the twine (though I did find it in the cupboard; let's go with that!). The actual weave part is pretty easy once you work it out: a few years ago I photographed the steps (below) and there is a little more instruction on how to do it here


There are a gazillion and one ways you can make dreamcatchers, I'm sure, but I think my favourite is this one with found natural materials. I love that it's not perfect, which highlights the organic and handmade nature of it. It's now hanging above Zak's bed (dreamcatchers, dinosaurs and Darth Vader go well together apparently!) and Layla has put in an order for a new one after the shell and feathers fell off hers. I told her it was because it's worked so well filtering out the good dreams to send to her in Dreamland and storing the bad, that it burst at the seams. But really it's because Annika thought it looked like it would hold her weight and decided to swing on it! Shhhh!
A reading tree
reading tree.jpg

I now have three children in school. THREE! Three out of four - I'm not sure how that happened so fast but there you go! I was a little concerned about Imogen starting Kindergarten as she is so young (she turns five in early March) but she is the third child, she is ready and excited to go and her preschool teachers promised me they would be honest and let me know if they thought she wouldn't be able to handle it. So while I worry (hey, it's my job, right?!) I also am confident that I made the right decision.

But seeing as last year kind of fell apart at the seams in terms of ensuring homework was always done and the home readers completed, this year I want the kids to nag

me

about reading, rather than the other way around. And so... the reading tree was created very spontaneously a couple of days ago. It's similar to a rewards system but it's also a record of things we've read throughout the year and also a pretty cool decor addition to our hallway! 

The idea is this: every time one of the kids read a book/part of a chapter book - or I read to them - they write their name, the book title and date on a leaf and stick it on the tree. Every 50 leaves stuck on the tree, I'll buy a new book for their library. 

I first came across this concept at my mum's preschool when I used to work there during university. During the Read-A-Thon, they would place leaves on the tree for all the children who read that day. In the end it was colourful and pretty and cool. I think she used paper as the tree - and you could do so if you rent or don't want anything marking your walls, but I wanted something more permanent for the year so I just painted it on the wall in our hallway just outside of Zak's room. I used watercolour paints (the

Micador paint palette

from Officeworks) and painted the tree on freehand in various shades of brown and black. The first strokes are quite dotty and don't look like it would look great at all, but once it's dry you simply gently wipe it over with a baby wipe or two and it blends beautifully. It is also easy enough to wash away - it might need a light coat of paint eventually, but it won't need much at all. I actually prefer using watercolours on the wall than proper paints - the blend of colours is so pretty.

Freehand painting - the outline hasn't been "smudged" yet.

Smudging the paint with a baby wipe.

The leaves are just cut up bits of coloured paper - we're going to start out with greens and greys and yellows and change colours as the seasons change. I envision it should look quite colourful by the year's end! I also imagine our book collection will be a lot fuller. And that can only be a good thing.

The cubby house that love (and lots of recycled timber) built - progress report


 Just to keep with our current trend of taking forever to finish things, here is a peek at another unfinished and s-l-o-w going project: a cubby for the kids. Just like last time, we decided to make it ourselves out of as much recycled timber as we could. So aside from buying the concrete, the saddles (? those metal things you put in the concrete for the main structural beams to sit in), and a few pieces of timber for the main frame, we've pretty much created a hodgepodge cubby house out of scrap materials we've found in various places. We've used bits left over from our own renovation, we've picked up fences people were throwing away, have raided council clean-up piles for long lengths of flattish wood for cladding and stolen bits and bobs from our families. One neighbour gave us his old architraves and skirting boards; the other neighbour donated old gates. An eBay slippery dip that just cost us petrol money to get was erected to one side; a found old timber ladder is screwed to the wall to allow the kids to climb to that platform for the slippery dip or the pole from our front porch that is now a fireman's pole. A tyre we rescued from the water was strung up off the small pergola and tied with rope from our boat's old anchor which is still at the bottom of the sea after getting stuck one day and being cut loose. We're planning to paint coloured polka dots on the tyre for fun and spray paint the pole in rainbow stripes using the stupid amount of paint I've stockpiled in recent years. 


This weekend just gone, we finally got around to laying the floor. Well Steve laid the floor. I helped  with the measuring then took one of our many children to one of many parties that they get invited to (all those estimates on what it costs to raise children? Do they include all the presents for their friends you're meant to purchase over their childhood as well? Cause those things add up!). Anyway the floor is a very uneven mismatched surface made from two different gates from next door. The panels were different widths, thicknesses and some had weird ridges so it's certainly not the smoothest floor going around, but they can stand on it and play. A lack of a roof and interior walls did nothing to stop the kids from moving in yesterday - Zak even hung a picture or two...


Even the broom and timber rocking chair were roadside finds (I scored a mid-century extendable teak dining table yesterday too. Yay!) and the chandelier was given to us by a neighbour at our old house for our first cubby.)


We thought about leaving the walls as is on the inside - the kids use the studs as shelves! - but they can also push out the cladding and some of the other walls are scarily hideous with all sorts of random bits of wood. No carpenter is ever allowed near our cubby!


Today I mixed up a bunch of black and grey paints I had leftover and gave the floor its first coat (it had a bit of a sanding yesterday). As soon as it was dry, off they went, dragging half the house in there with them and stayed out until after the sun went down.


Seeing as the finish line is in sight and they are so keen to play in there, I think we'll get a move on to finish it off. Famous last words! But tomorrow we'll paint the door (I said the kids could help - God help me) and I think some curtains are in order, solar fairy or cafe lights (seeing as the roof will again be clear - they should work well here!) for nighttime playing, and some scrap-fabric cushions and cheapie rug. So far it's been used as a shop, a tap-dancing stage, a house, a school, a movie theatre, a weapons storage bunker and general hang out spot. Tt was perfect timing getting that floor down in time for the holidays - yay!

This little house has been nicknamed "The Grubby House" (The Graham Cubby House). The previous one was "The Grugly House" (The Graham's Ugly House). I think this one might be slightly uglier, but we needed a new name so Grubby House it is. And oh boy, will it get grubby with my lot! It's going to cop a beating this cubby, which is kinda the point. x
DIY to try: tree stump pencil holder

I’m not sure how long this will last, but I’ve found a way to make my kids put their pencils BACK to the pencil place when they’ve finished using them rather than leave them scattered all over the ground for me to step-and-slide on. I saw one of these a while back and looked so easy I decided to try it. Finding the right size stump was the trick, but the father-in-law came to the rescue when he was cleaning up his yard and found this one. This was the easiest DIY I’ve ever done (um, because I didn’t actually do it!). I told him I wanted to chop it up and drill holes in it for the kids to put their pencils in. He looked a little worried for my sanity but said he’d chop it up for me (it was a long piece). Next thing I knew, a plastic bag was delivered to my home with the wood stump not only chopped, but drilled too. All I had to do was stick a bit of sticky felt on the bottom to protect the table surface. If you want to DIY, here’s how.


You’ll need:
A skinny tree stump or really thick branch and the ability to chop it up or saw it down
An electric drill with speedball or drill bit slightly wider than a pencil circumference
Sticky-backed felt
Scissors

How to:
1. Cut/chop the stump or branch to your desired size. I would have cut these down a but more, but hey, I didn’t have to lift a finger, let alone an axe, so all good.
2. Drill randomly into the wood about a third to a half of the depth of a pencil (remember they get shorter as you sharpen them!).

3. Cut a round of sticky felt and stick on the base. I also grabbed an old rag and roughly rubbed down the stump to get rid of any looseish bits of bark.


And there you have it – a funky way to stash the coloured pencils and keep them on display too. Pencils that draw pictures and write letters to the mermaids and fairies. And when you draw pictures of fairies for mermaids (!), you must have a fishtail plait in your hair. Because that’s what mermaids would do. Apparently.
{Images by Belinda Graham for The Happy Home}