Posts tagged decorate
Timber offcut wall niche planter box
wall niche planter 10.jpg

If you've ever renovated an old house you'll know how weird and wonderful they can be! Our home had a fair few quirks once we started ripping walls down and measuring up for the extension. One of the biggest dramas (because there is always drama of some kind during a renovation!) was that the centre of our house was not quite the centre of the house. In fact, it was out by 10cm (that'd be 100mm in tradie speak. I'm still getting my head around talking in millimetres!). It doesn't sound like a huge amount but when you're lining up the steel posts that need to reach from the foundation all the way up to the centre of the roof - seven metres higher - it is a royal pain in the butt and meant a whole lot of mucking about with various components of the extension being increased by tiny increments so the centre of the extension lined up with the centre of the existing house. They got it to work, but it left us with an extra thick wall - two and a half times thicker than a normal wall. So, as we've done with all little hiccups throughout our renovations, we just made it work. And we thought a nice deep niche would be a good way to highlight what would otherwise be considered a bit of a flaw.

wall niche planter 2.jpg

And when Steve brought some decking offcuts home from a job, I got to thinking: wouldn't this beautiful wide-planked spotted gum wood look smashing as a planter box in our niche? Yes, my thoughts said, yes it would.

wall niche planter tools.jpg

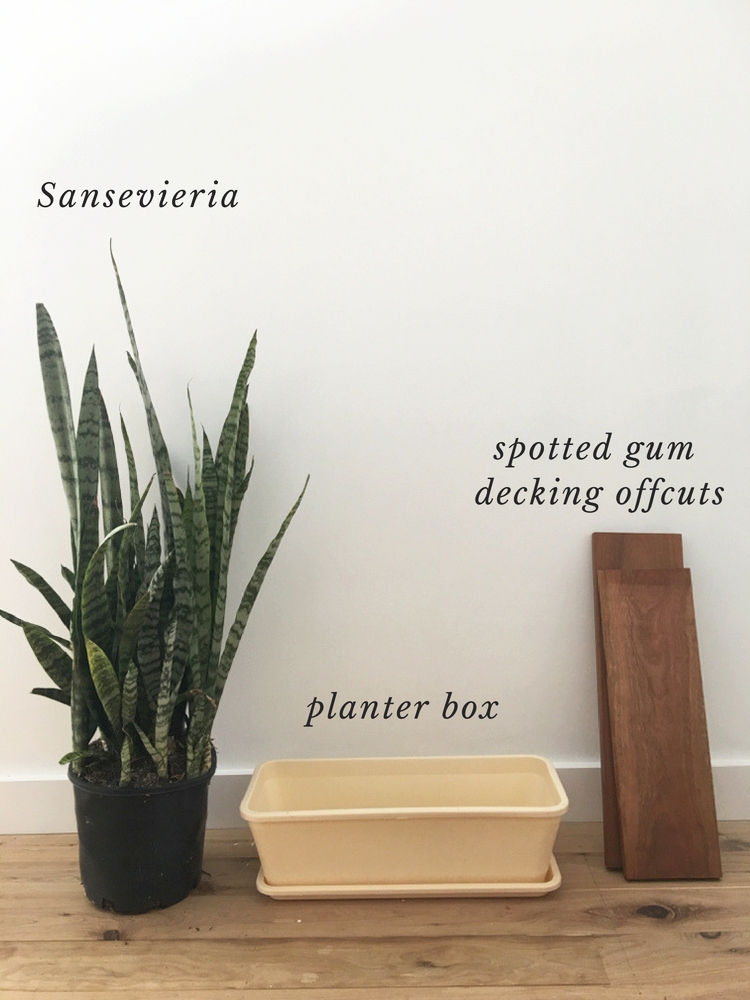
So I looked around for something to fit the space and found an el cheapo $5 plastic planter from The Reject Shop which miraculously fit onto the ledge. Steve worked his magic with some mitre cuts and whipped me up this lovely wooden surround which now houses a very thriving Sansevieria Plant. I can easily slip it out to give it some extra light should the need arise. 

wall niche planter 6.jpg
wall niche planter 5.jpg

I sanded the timber really lightly and gave it a bit of a rub down with some homemade beeswax polish and it's been perfectly perfect ever since. And MOST importantly, I haven't killed my plant. This is quite the news! Of course I now have a list as long as my to-do list of things to make with decking offcuts (and my to-do list is reaaallllly long). Stay tuned!


Before & after: roadside dresser
dresser before and after 4.jpg

For anyone who has read my blog for years (thank you!), follows me on social media (yay!) or knows me in real life (hi!), you'll know I love a good roadside find. In our part of the world, the local council allows each household six council clean-up piles every year, which means every week anyone who's had a big declutter piles all their discarded goodies onto the roadside just waiting for me to come and save them before the big bad rubbish truck comes early Tuesday morning. I'll show you some of my fab finds in a later post, but for now, here is my latest junk transformation. 

dresser before and after 5.jpg

I drove past this guy one afternoon with a carload of kids. I gave it a quick check over: no damage, nice and solid, great shape, loads of potential. It had a large mirror attached to the top by two large rods but they were simply screwed into the back of the dresser so were easily removed. I just needed the right screwdriver. So a few car trips, few less kids, few extra tools and a whole lot of magic car packing later and it was safely home ready for a little love. Before it got that transformative love, though, it got a whole lot of kids-playing-schools love. In the middle of the living room!

dresser before and after 1.jpg

Layla had claimed it as her own as soon as we saw it, so I asked her what colour she wanted it as we were about to finish renovating her room and actually decorate it. White. I don't know, but I think she could be my child! So I sanded it back, primed it and gave it around three thick coats of SolarGuard in semi-gloss (TIP: I always use outdoor semi-gloss on my indoor trim and furniture. If it can handle the weather outdoors, it can surely handle my kids inside!) I finished it off with some tiny gold handles from Bunnings for $2.60 each - they're like little earrings and I think they're perfectly dainty and feminine for the pretty shape of the piece.

dresser before and after 3.jpg

We moved it into Layla's room where it acts as a dresser for her bits and bobs but also a desk when she wants to draw and I kick her out of the kitchen. It happens. We're still to add a shelf and cork board/pictures above it, but for now it's home to a picture my mum painted when she was about 12. We made the wreath at our friend's Harvest Market a few months back. It's still in that same spot, albeit a little less green and healthy-looking! 

Beautifying and highlighting imperfections in the home
gold leaf kintsugi 1.jpg

If you've read my waffle for the past 9 and a half years (seriously, that is how long I've been blogging. That is scary.) you'll know how I'm not big on perfection. Perfect spaces, perfect people, perfect things - they are not real to me. Add a little wonkiness to a house, some mess to the waves of someone's hair or a few tell-tale signs of age on items and they become more interesting to me. And usually more beautiful. Recently I read about Kintsugi - a Japanese art form that sees damaged items repaired with gold (or silver). Rather than throw away broken crockery or smooth over cracks in rendered walls, the imperfections are highlighted with gold leaf and sealed with lacquer, creating an interesting feature of a home or allowing a favourite plate to continue dishing out your meals - with a little bling on the side. The method humanises things - giving them some attention, patching them up and letting them continue on their merry way rather than just giving up on them at the first sign of a breakdown. It's giving even the most ho-hum items a history, a story and a chance to shine. It's such a sweet sentiment in this throwaway world, and because I love gold leaf - and maybe because Marie Kondo and her whole "socks have feelings too" craziness has rubbed off on me more than I thought - I had to try it out on some damaged things I had around the house. 

First up: the small wooden bowl Steve found in the water on one of our walks a few years ago. It was green and gooey on one side and stunk like goodness knows what, but we thought it might clean up ok. So we soaked it and scrubbed it and it did clean up beautifully - but it was cracked in several places. So in went the size, and in went the gold leaf. It's certainly not the neatest follow-the-line I've ever done, but that's the whole point about this method: imperfections can be beautiful, and the wonkiness just gives it even more character. I love the glimmer on the rustic wood - I could never tire of that combo! 

Next, I hit up the kitchen cabinet where my Nana's dishes were. The pink floral plate was part of a few sets my grandparents bought many decades ago for my mum's wedding. I had a full set once - complete with tea cups and saucers - and accidentally threw the wrong box on the charity pile (and managed to keep a whole bunch of unwanted crap on the keep pile instead! Eek!) so I only have a few pieces left. I knew there was a big chip out of one of the side plates, so a few minutes later that chip looked a whole lot chipper (sorry) with its new gold coat - especially since the plate is gold-rimmed. I also blinged up a few op-shop pieces - several chips in a little star candlestick and the tiniest crack in a milk-glass bowl.

I actually thought that was all I had when a few nights later I decided to try my hand at making a wooden spoon out of a piece of driftwood and a lino-carving tool. Obviously, neither of these things are going to work as well as, say, proper wood and a real wood-carving knife. But I wanted to see what it was like to do before I invested in a proper knife and so had a play. It was strangely addictive - I drew a shape, cut and carved with the rounded lino tool (and yes, cut myself several times) and in an hour or so had a pretty cool shaped spoon. Except a knot was right where the rounded end of the spoon was and soon became a hole! And then, while wondering when I should quit it on the handle -  SNAP! I wondered too long so the whole thing broke. I originally threw it on the compost, but decided to keep my very first attempt at spoon carving because I really enjoyed doing it - even if it was never going to be able to be used as a spoon, was not even close to smooth and had a hole in a crucial part of it. Steve glued it together for me and I gave it the gold treatment. Now, rather than just being a weird unfinished, holey, broken wooden spoon, it's got a story, a history and a little bit of prettiness about it. I love that!

It's kind of an addictive idea - I can't help look around the house and see other imperfections I'd love to highlight somehow: holes in the floorboards from old knots, cracks in the concrete driveway... I'm completely in love with both of these ideas, above, from the

original article

I read about kintsugi. The art form is not just about gold leaf, but also patching things with similar materials but in different shapes, colours or patterns - such as adding the odd patterned tile in a bathroom wall of solid colour tiles. It really is giving the less-than-perfect aspects of a home some time in the spotlight to shine. And who doesn't like that occasionally?

{Top 3 images by Belinda Graham for The Happy Home. Concrete and gold leaf image is an part of an installation called Seam by Catherine Bertolt via

Workplace Gallery

; Patchwork timber floorboard via

Material Valley

}

A handmade scrap-fabric birthday banner


With so many new additions to our extended family in recent years, birthday season is now pretty much all year round. Except August. I don't think anyone was born in August, thank goodness - it's nice to have a whole month off... But in our immediate family, we have six a year to celebrate - that's six weeks in a year we leave the house decorated with banners, balloons, streamers or whatever else we threw up for said birthday person. We each get a week for the house to look special (or, frankly, until the balloons pop or the streamers dampen in the cool air, stretch and are tripped over. Then it's all over red rover.) To add to the specialness, I've been meaning to make a proper fabric bunting for, oh, the best part of 10 years. I always thought it would nice to have one bunting to suit all family members. Instead, I've spent the last 10 years worth of kids birthdays making paper versions!

Last week I was looking at all the scrap bits of random fabric I have in my fabric box and just started laying them out in a pattern that went together: blues, greens, greys, whites, dusty pinks in stripes, florals, solids and textures. I realised there was a piece of fabric to represent each of us. And some special bits in there too - vintage fabric from my Nana's estate; a dress the girls all wore to death that could not be repaired; one of Steve's old business shirts; new pieces I loved; older faves I've made other clothes out of. Some of the fabric was too small to create proper triangle bunting bits, so I got to cutting them into random strips - some fat, some skinny, some short, some long. I'd seen something similar a few years back at Purl Soho, which I loved and was inspired by. I did back-to-back pieces so it would be the same from either side and stitched it all together, adding ribbon-like lengths to the ends to hang. I hung it up last week for my birthday and haven't taken it down yet. It kind of looks nice just hanging there - not too birthday-ish! I love that it's made with tiny pieces of our family's history, that it's made with basically scrap and useless pieces and that it is the right amount of girlie and masculine to suit the four of us girls as well as Steve and Zak. And also that its rough edges will likely fray over the years, ageing a little more each time it makes an appearance - just like the birthday boy or girl it'll be hung up for when it does.
Kids craft DIY: nature-walk dreamcatcher

As babies, my kids were hopeless sleepers. Annika is just two and maybe not officially a baby (when ARE you officially not a baby?!) but she still is a hopeless sleeper. As in wakes-up-every-hour kinda hopeless. And only-sleeps-while-being-breastfed-to-sleep kinda hopeless. It's exhausting. When they reach three-ish and finally get how bedtime and sleep works, I do anything in my power to keep it that way. So when the bad dreams start or the night-waking becomes a regular occurrence, we jump on it - with cuddles, bribes to go back to bed... and dreamcatchers. New ones every now and then seem to do the trick - it must be a mental thing?! The kids like to help make them, so we have made a few different ones with various bits and pieces such as fluoro string, beads, buttons, shells, crystals etc. Zak asked for one the other day after having a bad dream, so I told him we'd try and make it just from things we find on a nature walk. So we grabbed a long vine-like length from a plant down the road for the hoop, chose a few feathers from the waterfront and a shell with a natural hole in it for the centrepiece. The only thing we didn't find was the twine (though I did find it in the cupboard; let's go with that!). The actual weave part is pretty easy once you work it out: a few years ago I photographed the steps (below) and there is a little more instruction on how to do it here


There are a gazillion and one ways you can make dreamcatchers, I'm sure, but I think my favourite is this one with found natural materials. I love that it's not perfect, which highlights the organic and handmade nature of it. It's now hanging above Zak's bed (dreamcatchers, dinosaurs and Darth Vader go well together apparently!) and Layla has put in an order for a new one after the shell and feathers fell off hers. I told her it was because it's worked so well filtering out the good dreams to send to her in Dreamland and storing the bad, that it burst at the seams. But really it's because Annika thought it looked like it would hold her weight and decided to swing on it! Shhhh!