Book Week costume: The blue crayon
I feel like it's been ages since I was creative. And I've really missed it! But Book Week is coming up and I love me a good homemade costume. I decided to document them this time -
before
the parade - to show how far a little bit of hot glue and cardboard can go! I've made three costumes and I'll share them here in three posts with a couple of easy DIY aspects. I love making costumes for Book Week and Halloween. I think they're my favourite thing to do! Maybe I go overboard, but we all have fun coming up with the ideas and the kids adore seeing it all come together. I never spend a bomb - it's usually just on a few bits and pieces and if fabric is involved, I try to recycle other handmade costumes into new outfits first before hitting Spotlight. This year there is no sewing - despite making a skirt for one of the costumes! First up though is one of my favourite books - probably one of most people's favourite children's books:
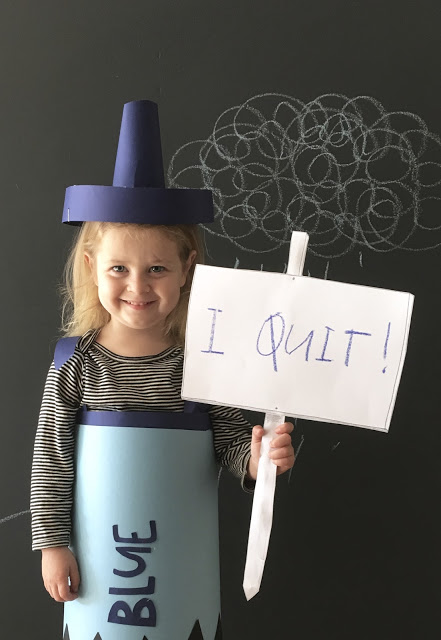
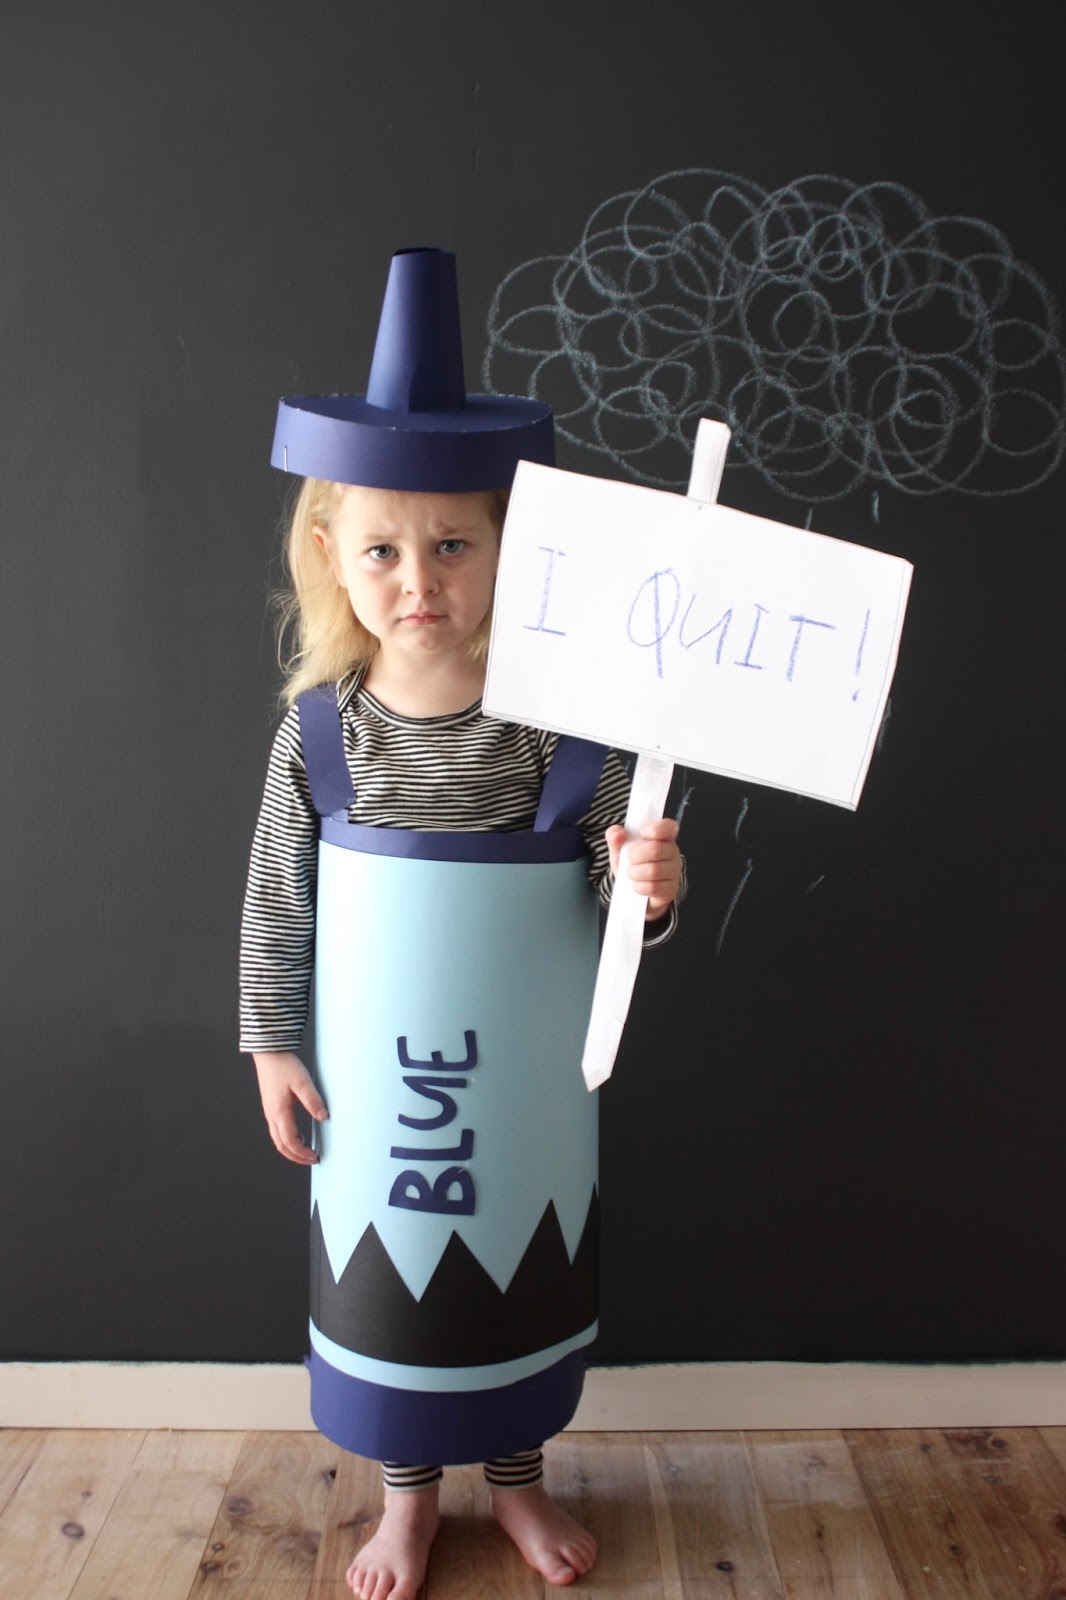
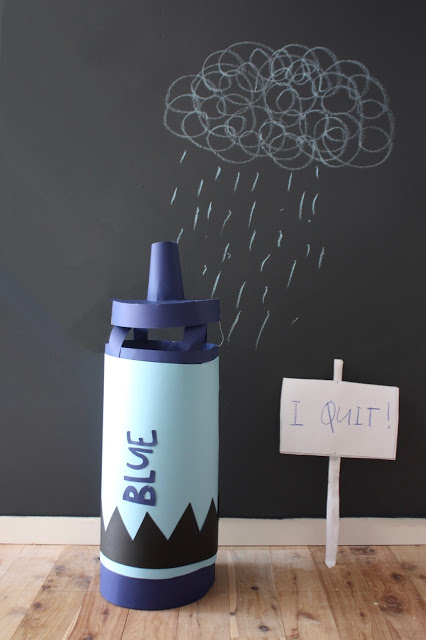
The Day the Crayons Quit
. How adorably funny is it? Being a shorty herself, Annika was the perfect candidate for the stubby friend, Blue Crayon. She's also brilliant at being a cranky pants, so when I told her to look angry, cause she's meant to be all fed up and over working, she did so beautifully! Anyway, the actual costume is easy enough to make - simply glue the cardboard layers in place and fit around the body, glueing alllllll the time. You'll need two sheets of each colour and you'll need to stick them together to get more length else they won't quite fit around a body! I don't recommend hot-gluing the straps on as ours tore (see below!); I think a stapler might be better? Or maybe it's just that cardboard straps and a three-year-old aren't the best combination! The sign was also easy - crayon and lead pencil on a piece of white paper and then glued onto sturdier cardboard and a bamboo stick. The hat was a little trickier! I made a couple before deciding this was the best.

The Day The Crayons Quit hat tutorial
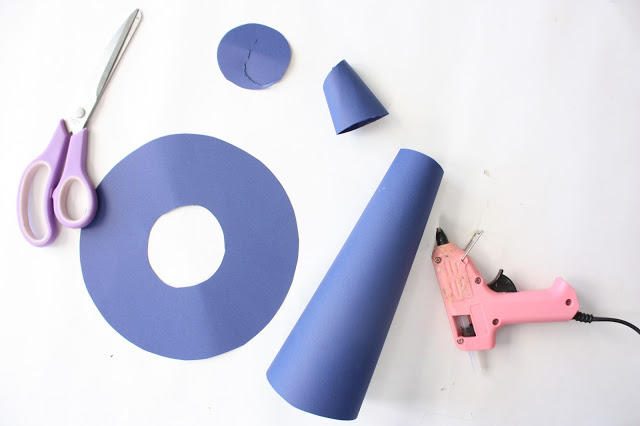
You'll need...
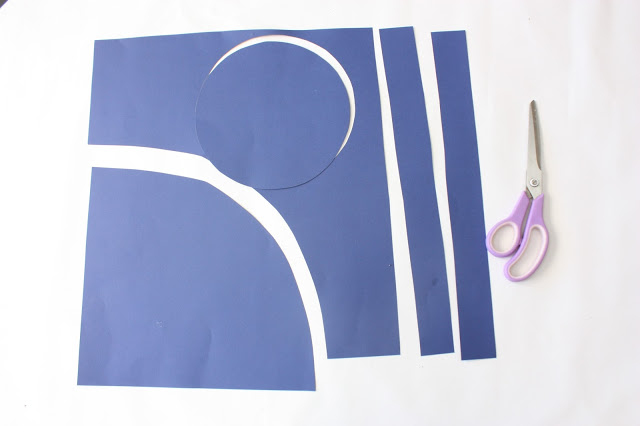
Cardboard the same colour as your crayon colour of choice. I used the square left over from when I joined the two pieces together to make the base.
A hot glue gun
Scissors
Hat elastic or ribbon
A pencil
A small plate - a side plate is a good size
Step 1:
Cut two strips off the end around 3cm wide. Trace around the dinner plate and cut out the circle. Cut one corner into a arc (make it bigger than the circle; you can cut it down to size later).
Step 2:
Roll the arc up into a cone shape and glue in place. Cut off the pointiest part. Cut a smaller hole out in the middle of the circle.

Step 3:
Poke the cone through the circle and push through until it stops. Draw a line around the meeting point on the underside of the circle.
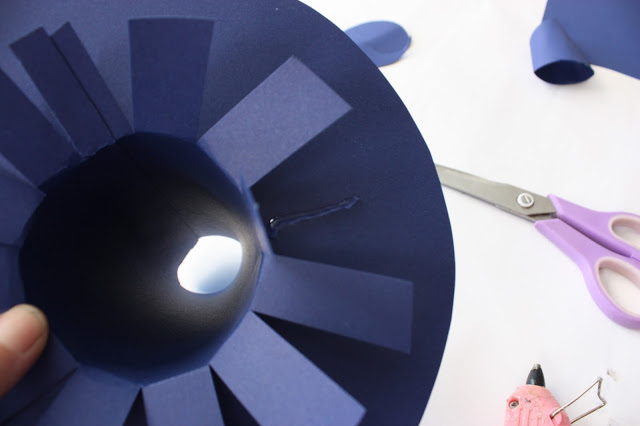
Step 4:
Remove the cone and cut strips up to the pencil line a centimetre or so apart. Bend them outwards. Pop the cone back into place in the circle and glue where the tabs meet the underside of the circle (or is a hat brim now?!)
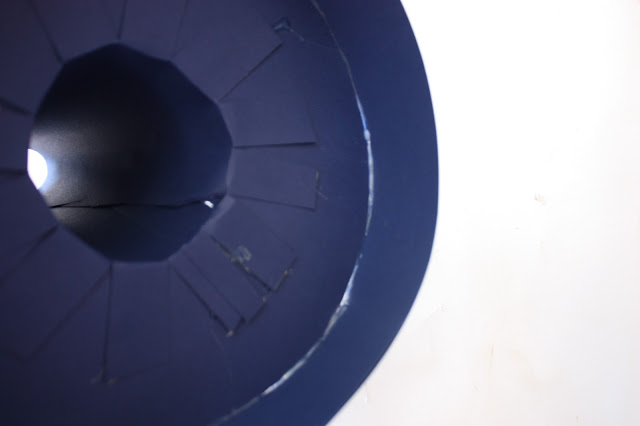
Step 5:
Glue the two strips together to make one long line (you might need to tidy it up with the scissors if you're not the straightest cutter of all time. Like me!). Glue the very edge of one side and gently wrap it around the hat brim, pressing while the glue is warm (be careful; it's hot!) and holding until it cools and hardens. Continue around the whole hat. Once finished, turn the hat over and circle around the whole join on the underside of the hat again with hot glue to ensure it sticks - two fine edges of cardboard meeting isn't the most secure thing so an extra blob of glue all around should keep it together. Trim the cone to your desire length. Poke a small hole on either side of the hat (you want the join of the cone to the back) and tie in your elastic. Become the crayon!