Posts tagged dress ups
Book Week 2018
book week 2018.jpg

It feels like I only made last year's Book Week costumes last week! But apparently a year has passed and I've spent the last two nights and one day making costumes yet again for a few seconds around the school COLA for the parade. But I love it, and the kids love it, and I could happily make costumes every week for fun if I had the time! The only thing I bought this year was the swirly straw Annika used for her pink milk. And technically poster paints, but I don't really count those because I needed them as I recently had a big craft-cupboard clean-up and my old ones had gone off and needed replacing.

book week 2018 apollo and cheshire cat.jpg

My costumes are usually made from stuff around the house - I've always got stashes of various fabrics, lots of spray paints and craft stuff, and when I know these costumey-events are coming up, I hold onto cereal boxes because I find they're the perfect thickness for making stuff out of! So this year we have...

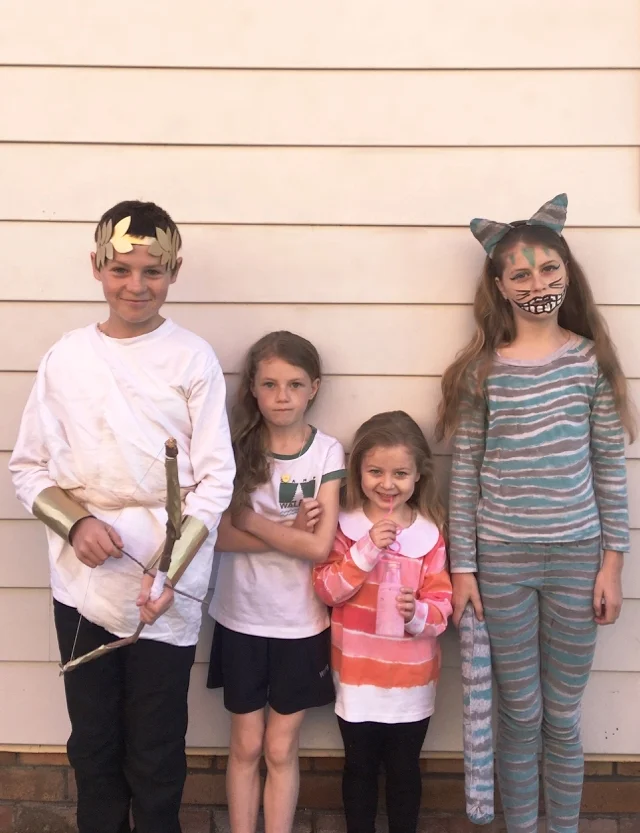
Zak as Apollo, God of the Sun, Percy Jackson and The Olympians

book week 2018 apollo percy jackson and olympians.jpg

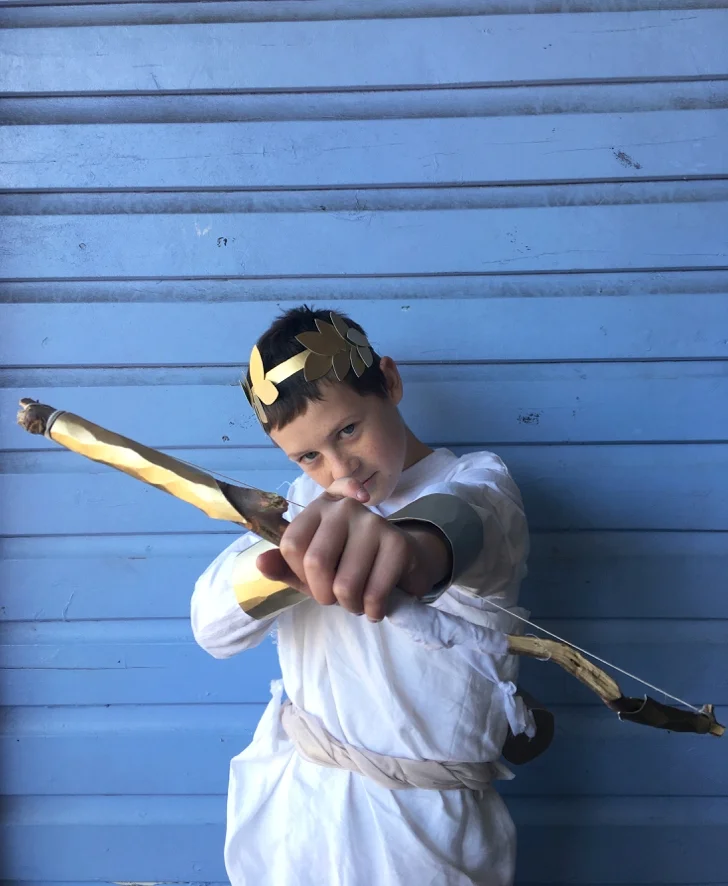
He decided at 4pm the day before the parade he wanted to be Apollo. A bit of frantic Googling and I realised I could do it. A cereal box spray-painted gold would make cuffs, a headpiece, arrowheads, a quiver and decorative aspects of a bow. A branch and few sticks from the fire pile became a bow and arrows, a piece of linen and shimmery chiffon were tied into a tunic/robe and he was good to go. 

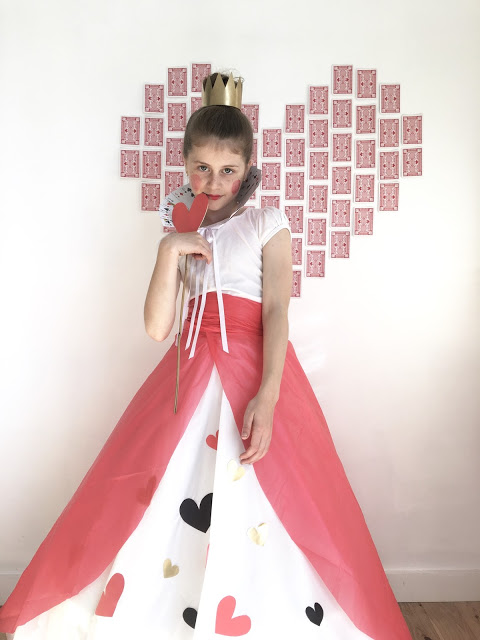
Layla as The Cheshire Cat, Alice in Wonderland

book week 2018 cheshire cat.jpg


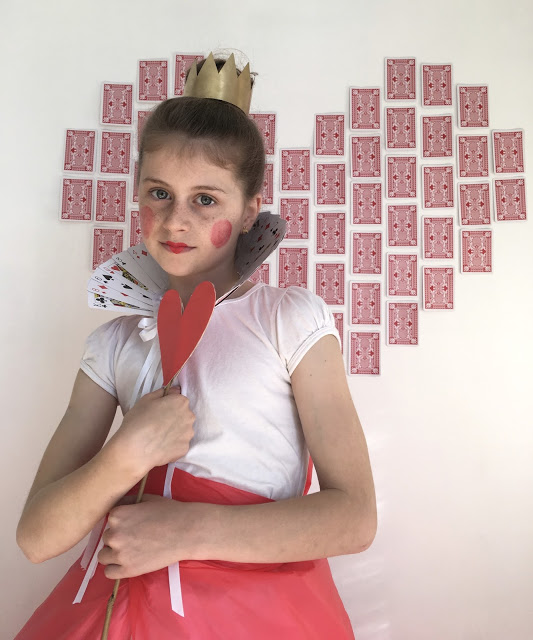
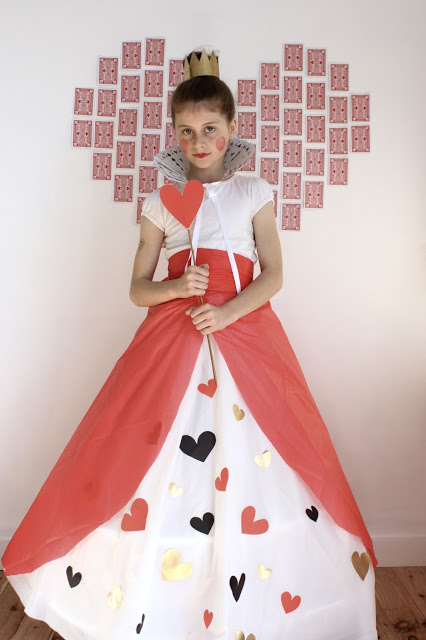
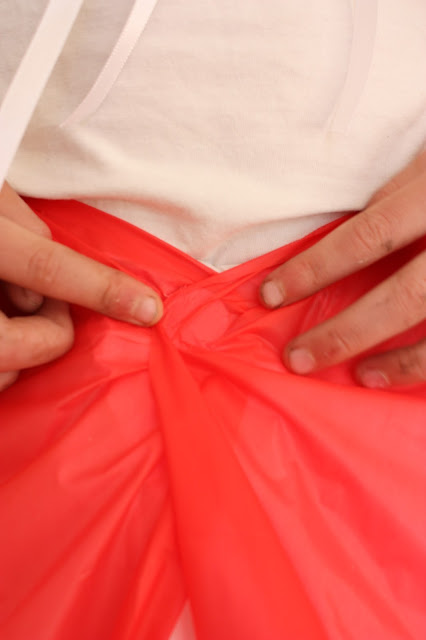
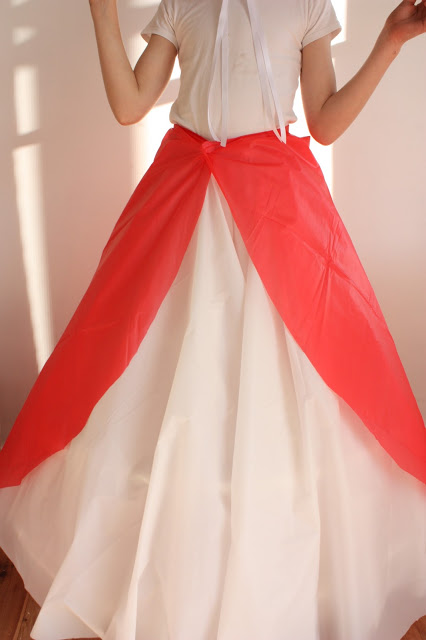
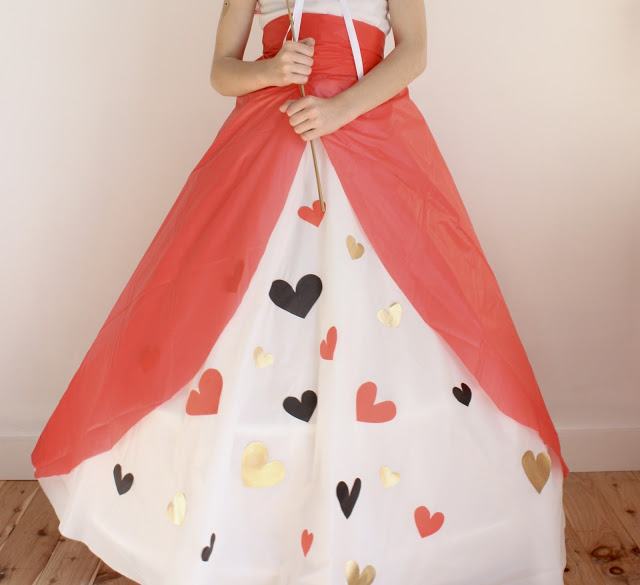
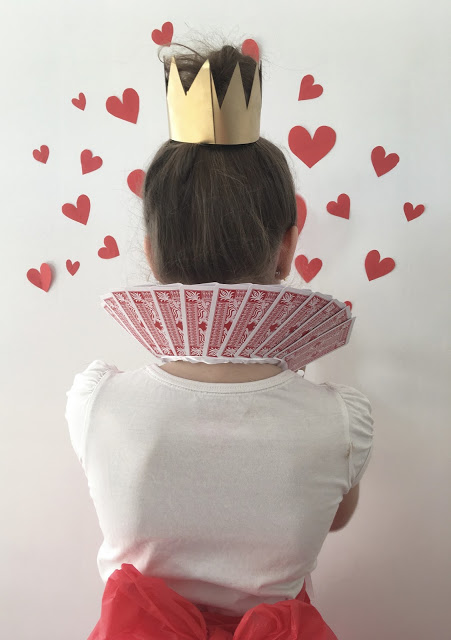
Layla has now, in her Book Week career, been three characters from Alice in Wonderland. Alice, of course, the Queen of Hearts last year and now the Cheshire Cat. As winter comes to an end, all the white long-sleeved tops the kids have worn as their winter uniform are now pilfered and discoloured, so rather than throw them all out, I keep them cause they make great costumes - i just use poster paint on them with a bit of paper/cardboard inside the shirt to stop the bleed. They're a little stiffer than fabric paints - though still soft enough to wear - but they're only meant to be worn for a day tops, then they're thrown in the dress-up clothes boxes. Mine are now overflowing... So a pair of light grey leggings that Layla had grown out of were paired with a white long-sleeved shirt and I used some grey cotton fabric I had in my fabric box for the tail and ears. To make the white shirt a similar colour I squirted a tiny bit of black poster paint into a water-filled spray bottle, shook it up and sprayed the shirt on the washing line until it had greyed up. Then once dry I spent a ridiculous amount of time painting on dark grey and turquoise stripes - front and back. The morning of the parade, Layla took so long getting ready (as is every morning with Layla) that she only left me with 10 minutes to attempt the Cheshire Cat make-up. It wasn't the best job, but it was good enough!

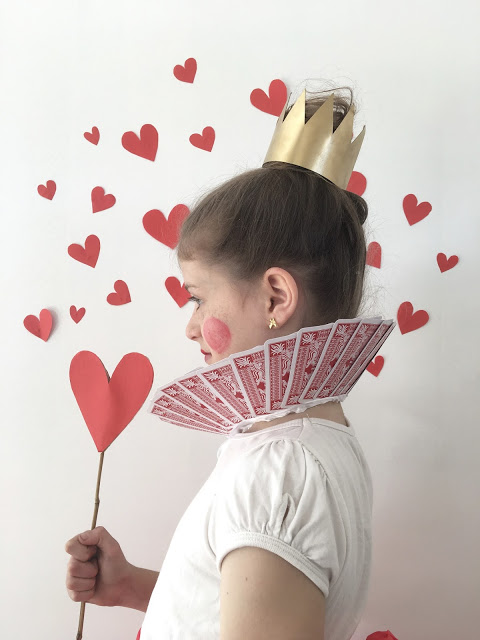
Imogen (and Saraya) as Annie and Hallie, The Parent Trap

book week 2018 the parent trap.jpg

Immy was so funny - she came home about a month ago asking me what twins her friend Saraya and her could go as for Book Week. I giggled at the thought of these two being twins - as you can see, they look so much alike! But I suggested Tweedle Dee and Tweedle Dum ("ew! nope!"); Thing One and Thing Two ("They're weird") and that was about the extend of my twin character knowledge. "We want to be girls," she whined. Sweet Valley High was the only thing that came to mind until we Googled and then of COURSE we knew The Parent Trap - the kids love that movie. Seeing as a book version existed, we went with that! So for the next four weeks both girls would ask me when their costumes would be done. Clearly Imogen has no clue about how I work because I do things LAST MINUTE around here and so the day before is when their shirts would be ready. I used freezer paper to make a stencil of the camp logo the girls wore in the movie and just used poster paint to paint it on. Then i painted the collar and sleeve rim, spray painted some wooden heart beads I had and threaded some string though it for their lockets and they wore it with their sports shorts and identical trainers. Done! I was waiting for Immy to complain her costume was boring but she was just so excited to be a twin for the day she didn't care!

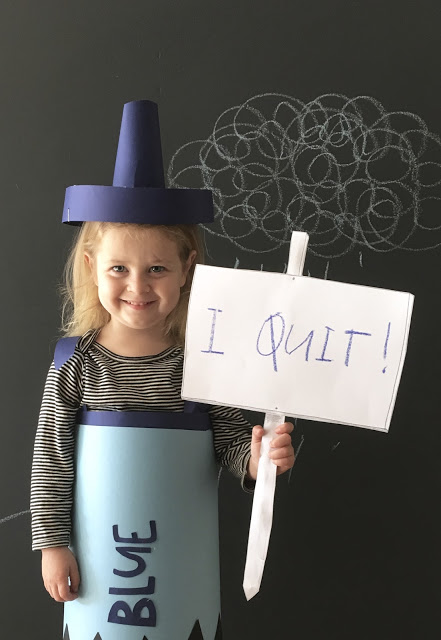
Annika as Lola, Charlie and Lola

book week 2018 charlie and lola.jpg

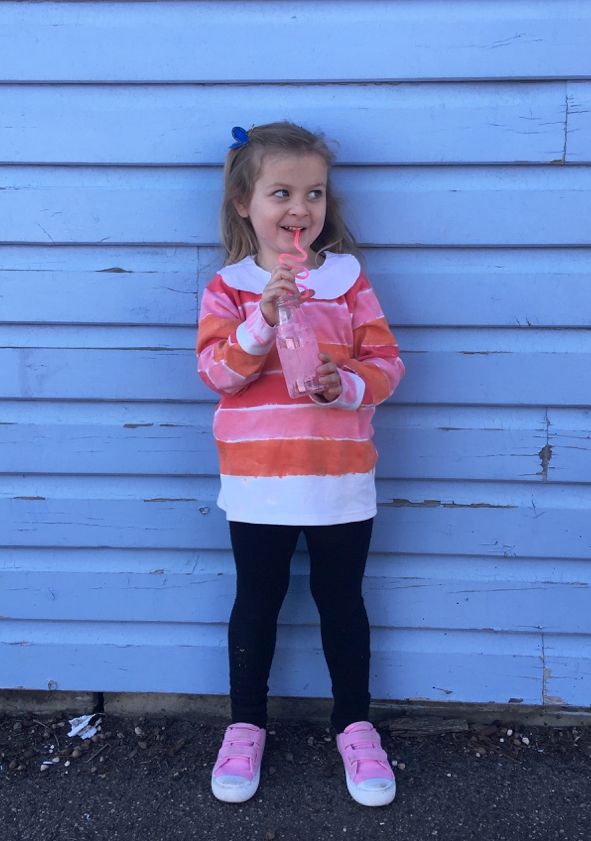
Originally this little poppet wanted to be Charlie from Charlie and Lola, but somewhere along the line swapped to Lola. I actually had the perfect Lola dress already - a little long-sleeved floral hand-me-down but she really wanted the dress from I Won't Ever Never Eat A Tomato. So more painting it was! Layla's long-sleeved top worked close enough as a dress, so I taped up some stripes and let her paint them on. I hot-glue-gunned on a Peter Pan collar, painted a plastic bottle pink and threw in a swirly straw for her pink milk fix. I also just drew some teardrops and had her colour them in, then cut them out and glued them onto some bobby pins for her little butterfly clips. I love Charlie and Lola and have always wanted to do a birthday party in that theme cause I thought the decorations could be so much fun! I might still have to do that....

So next up is Halloween - I'm making Layla go as the Cheshire Cat again because darn it those stripes took forever and I want to get my time's worth out of them! And also because I kind of want to have another go at getting that make-up right! 

Book Week costume: Lost and Found boy
lost and found cover.jpg

Our household adores Oliver Jeffers. He can do no wrong! His illustrations and stories are so sweet and heartwarming. And those characters he comes up with? Adorable! They're the perfect little characters to bring to life. I wanted to recreate the cover of

Lost and Found

as soon as I saw it. I got close one day when Annika sat in an upside down umbrella at the cricket but there was a cute penguin missing and she wasn't wearing the right gear so I figured a future Book Week would be the right time. And here we are! I asked Immy if she was keen to wear it in the parade and she was so excited and wanted everything perfect - down to the tiniest detail like a little brown suitcase and a tag hanging from the umbrella handle. No pressure, Immy... Well, it may not be perfect but it turned out pretty cute anyway! I don't normally like buying things with the sole purpose of destroying them but when I realised I had already thrown out my old umbrella that didn't close, I searched for a cheap one - this was a whole $4 so I had no problem cutting a hole in it. Especially after one of the inside arms broke within two minutes of Annika stealing it and walking around the house with it. That's what $4 gets you I guess! Painting umbrella fabric wasn't very successful so I bought some yellow and orange cardboard and cut them up. At first I used double-sided tape to stick them on, but after they came away it was the hot glue gun to the rescue yet again!

Lost and Found

umbrella costume tutorial

You'll need...

A small-to-medium-sized umbrella you're happy to ruin. A hooked handle is even better

2 sheets of orange cardboard

2 sheets of yellow cardboard

Black paper or cardboard (optional)

Hot glue gun

Brown kraft paper 

String

Scissors

Step 1:

Measure up the cardboard against the umbrella - you want it in-between the metal parts. Cut to size and hot glue gun into place.

Step 2:

Overlap at the centre of the umbrella and continue all around alternating the colours.

Step 3:

Cut a circle from the black card or paper and a smaller circle from the middle and slide it over the point of the umbrella and glue in place to 

hide all the joins of the cardboard.

Step 4:

Turn the umbrella over and see where you want the legs to go. I used liquid chalk to draw a quick outline and then just cut through the plastic and into the cardboard. Cut the two pieces together for the neatest line. 

Step 5:

Reinforce the cardboard with some more glue around the edges of the hole.

Add a little kraft paper tag from the handle, insert child and have them hold the umbrella and hug a penguin. We made our penguin from paper mache but if you're not that keen (I realise I'd be in the minority here!)  maybe you can make a child's day/week/month/year by buying them a penguin Beanie Boo (dear god WHAT IS WITH THOSE THINGS? Why do they love them so much?!) 

And also... We didn't have a red and white striped shirt BUT we did have a very stained plain white one so I grabbed some red poster paint and got painting. I stuck good old plain sticky tape into stripes on the top and painted in-between - it made the perfect stencil by peeling off easily and didn't bleed! Steve knitted the hat in the right colours (not that you can really see the orange band!). And a tiny suitcase was also made with a plain brown box, some kraft paper to cover up the stamps, and a little leather strap glued on the top as the handle. And that's it! Imogen is so excited and can't wait for the parade (though I'm sure I'll be carrying home an open, ruined, yellow and orange umbrella as soon as the parade is over!) 

Luckily Zak just wants to be Klaus from

A Series of Unfortunate Events

which pretty much involves a pair of glasses, a collared shirt and jumper and maybe a book or two?!? At least it's not a

Clone Trooper

this year! 

I'm thinking this one might be my favourite of the three I created this year (I also made the blue crayon from 

The Day The Crayons Quit

 and The Queen of Hearts from 

Alice in Wonderland

). Which do you like the most?

Book Week costume: The Queen of Hearts
queen of hearts.jpg

I know what you're thinking: "Wow! No one has EVER - in the history of book parades - gone dressed as an

Alice In Wonderland

character!" But I chose the Queen of Hearts for a few reasons - one of them because I wanted to finally use the fantastic IKEA Lattjo Queen crinoline and skirt I bought ages ago (which is no longer available by the looks of it). And secondly, because it IS a popular character and I think it's pretty darn easy to make it look fantastic without having to sew anything or buy too much. All I bought for this outfit was a packet of cards and two plastic tablecloths for the skirt from Kmart. A grand total of $7 was spent as I had the rest of the stuff at home already. I realise part of what makes this look good is the puffiness from underneath it - a tutu or frilly skirt should do the trick and if you have a girl, chances are you have one of those lying around your house already! The collar I discovered on Pinterest in various incarnations and is so simple but so effective! Bravo to the clever person who came up with the original idea! 

So what does one need for the Queen of Hearts? A skirt, a crown, some heart lips, rosy cheeks, heart-shaped staff and a very fabulous card collar. And Layla's royal pain-in-the-butt princess attitude goes a long way too...

Queen of hearts plastic tablecloth skirt tutorial

You'll need...

A white round plastic tablecloth, $2 from Kmart or pretty much any bargain/party shop (For memory the size was 2.1m)

A red rectangle plastic tablecloth, $2 from Kmart (or other budget/party shop)

Thick elastic

A hot glue gun

A sticky velcro hook-and-eye dot

Scissors

Coloured paper in black, red and gold (I just spray painted a sheet of paper with gold spray paint before cutting it up into hearts)

A large safety pin

A tutu, frilly skirt, net or hoop for underneath

Step 1:

Unfold the round tablecloth until it's folded into a quarter, as above. In the pointy corner which is the centre of the tablecloth (the bottom right in this picture), cut across it to create a hole in the middle. 

Step 2:

Unfold so it looks a little like a white plastic donut! You might need to make adjustments here to make it bigger if you were cautious with your original cut - you'll want to be able to step into the hole and pull it up around your waist with plenty of room to spare. 

Step 3:

Carefully fold back the edge of the hole so it forms a seam big enough to easily thread the elastic through afterwards. Use your hot glue gun to gently glue the seam in place. Don't leave it on the plastic too long - it will burn a hole in it! But the glue itself does a pretty good job. Continue all the way around back to the beginning but leave a bit of a gap to allow the elastic through.

Step 4:

Attach a safety pin to the end of a piece of elastic and thread through the seam gently. Work out what will fit comfortably around your child before tying it off and cutting. The skirt will gather slightly. Pop it on your child - they'll be your mannequin for the next few steps.

Step 5:

Unfold the red tablecloth and lay it out on the floor. Cut off a strip longways - about 40cm thick and put aside. This will be your ribbon to hide all fake-sewing sins!

Step 6:

Wrap the larger piece of the tablecloth around your child, covering the top of the white skirt. Pinch at the meeting place and have your child hold.

Step 7: 

Stick on the sticky velcro dot to secure.

Step 8:

Cut from the velcro dot down along each side on a diagonal, curving at the bottom.

Step 9: 

Fold the skinnier piece of the red tablecloth you had set aside into a neat strip and wrap around the waist, covering the top of both skirts. Tie into an oversized bow at the back.

Step 10:

Cut out paper hearts in various sizes and colours and stick in place on the front of the white skirt that is visible. 

♥♣♦♠♥♣♦♠♥♣♦♠♥♣♦♠♥♣♦♠♥♣♦♠♥♣♦♠♥♣♦♠

Queen of Hearts card collar tutorial

I'm sure this doesn't actually need a tutorial as it's pretty easy, but here is what I did anyway! 

You'll need...

A packet of playing cards, $3 from Kmart

A hot glue gun

White ribbon

Step 1:

Fan out several cards until you have a rainbow! I wanted more than just the number showing so placed them individually in place to create this shape. Once you're happy with the placement, begin gluing them together.

Step 2:

Glue gun the ribbon over the bottom edge of the cards on the front. It's not pretty but it won't really be seen anyway (and is really hard to do neatly!)

Step 3:

Do the back as well for extra strength and neatness (and also to avoid potential paper cuts!) Glue the very edges of the ribbons together where they first meet. Tie around the neck gently - it will naturally sit upright as you tighten and tie off into a bow.

♥♣♦♠♥♣♦♠♥♣♦♠♥♣♦♠♥♣♦♠♥♣♦♠♥♣♦♠♥♣♦♠

For the rest of the costume... 

Crown

A cereal box is my secret source for all things costumes. I once made a Star Wars Clone Trooper costume for Zak out of cereal boxes! They're the perfect stiffness while being thin enough to easily work with. Anyway, I just cut out the zig zag crown, spray painted it gold and glue-gunned it into place. It just sits on top of her bun - no comb; no headband; no bobby pins!

Staff

Again, a cereal box with glued-on red paper cut into two hearts and glued back-to-back with a bamboo stick sandwiched in-between!

Make-up

Red face paint was painted onto lips in a heart shape with a really fine paintbrush. The same paint was mixed with moisturiser for the rosy cheeks. A red lippy would also work, obviously! We used gold eyeshadow on the eyes too. 

Layla and I both love how her costume turned out. She originally was going to be the Cheshire Cat and was just going to model this one for me for the blog, but as soon as she put it on she changed her mind! Not sure how she'll go sitting in class with that huge skirt on though! Ha! 

Want more? Check out a cute and easy crayon costume from

The Day The Crayons Quit here

Book Week costume: The blue crayon
the day the crayons quit.jpg

I feel like it's been ages since I was creative. And I've really missed it! But Book Week is coming up and I love me a good homemade costume. I decided to document them this time - 

before

 the parade - to show how far a little bit of hot glue and cardboard can go! I've made three costumes and I'll share them here in three posts with a couple of easy DIY aspects. I love making costumes for Book Week and Halloween. I think they're my favourite thing to do! Maybe I go overboard, but we all have fun coming up with the ideas and the kids adore seeing it all come together. I never spend a bomb - it's usually just on a few bits and pieces and if fabric is involved, I try to recycle other handmade costumes into new outfits first before hitting Spotlight. This year there is no sewing - despite making a skirt for one of the costumes! First up though is one of my favourite books - probably one of most people's favourite children's books: 

The Day the Crayons Quit

. How adorably funny is it? Being a shorty herself, Annika was the perfect candidate for the stubby friend, Blue Crayon. She's also brilliant at being a cranky pants, so when I told her to look angry, cause she's meant to be all fed up and over working, she did so beautifully! Anyway, the actual costume is easy enough to make - simply glue the cardboard layers in place and fit around the body, glueing alllllll the time. You'll need two sheets of each colour and you'll need to stick them together to get more length else they won't quite fit around a body! I don't recommend hot-gluing the straps on as ours tore (see below!); I think a stapler might be better? Or maybe it's just that cardboard straps and a three-year-old aren't the best combination! The sign was also easy - crayon and lead pencil on a piece of white paper and then glued onto sturdier cardboard and a bamboo stick. The hat was a little trickier! I made a couple before deciding this was the best.

The Day The Crayons Quit hat tutorial

You'll need...

Cardboard the same colour as your crayon colour of choice. I used the square left over from when I joined the two pieces together to make the base.

A hot glue gun

Scissors

Hat elastic or ribbon

A pencil

A small plate - a side plate is a good size

Step 1:

Cut two strips off the end around 3cm wide. Trace around the dinner plate and cut out the circle. Cut one corner into a arc (make it bigger than the circle; you can cut it down to size later).

Step 2:

Roll the arc up into a cone shape and glue in place. Cut off the pointiest part. Cut a smaller hole out in the middle of the circle.

 Step 3:

Poke the cone through the circle and push through until it stops. Draw a line around the meeting point on the underside of the circle.

Step 4:

Remove the cone and cut strips up to the pencil line a centimetre or so apart. Bend them outwards. Pop the cone back into place in the circle and glue where the tabs meet the underside of the circle (or is a hat brim now?!)

Step 5:

Glue the two strips together to make one long line (you might need to tidy it up with the scissors if you're not the straightest cutter of all time. Like me!). Glue the very edge of one side and gently wrap it around the hat brim, pressing while the glue is warm (be careful; it's hot!) and holding until it cools and hardens. Continue around the whole hat. Once finished, turn the hat over and circle around the whole join on the underside of the hat again with hot glue to ensure it sticks - two fine edges of cardboard meeting isn't the most secure thing so an extra blob of glue all around should keep it together. Trim the cone to your desire length. Poke a small hole on either side of the hat (you want the join of the cone to the back) and tie in your elastic. Become the crayon!

DIY: wooden peg star fairy wand
fairy wand .jpg

With a gold-sequin tutu, gold wings and gold butterfly mask, my golden girl Immy was just missing a gold fairy wand to complete her outfit. You see, she had a

silver

fairy wand. And apparently, one cannot mix their metallics when dressing as a fairy. So inspired by

Sofia's so-pretty gold Christmas stars

made from wooden pegs (do you remember making wooden peg crafts at school? I made a trivet), I decided to adapt it slightly to include a stick for a wand. And now her look is complete! So we celebrated with a sprinkle of gold confetti and glitter because, well, why not! Want to DIY? Here's how... (I do apologise for my lack of images. I thought I'd taken more...) 

Toolkit:

  • 8 wooden pegs
  • Two long thin and flat paddle pop sticks (I honestly don't know if that's what they are. They are from one of those dollar store craft shops.)
  • Glue (I used craft glue to stick the pegs together but a hot glue gun to create the star)
  • Gold spray paint (I will never buy cheap spray paint again. I've tried a whole bunch of paints and usually stick to Rustoleum or White Knight.)

How to:

Step 1:

Remove the metal spring holding the two peg pieces together by gently twisting the peg until it starts to pop off (haha "pop off" - my kids would be so happy I wrote that).

Step 2:

Flip the two halves of the peg so the outside edges are now flush against each other. Glue together ensuring the two halves are in perfect alignment. Repeat until seven of the eight pegs have been glued inside-out. Leave to dry.

Step 3:

Glue the two paddle pop sticks together. Leave to dry.

Step 4:

Sandwich the paddle pop stick between the last peg halves and glue in place. You might want to use a hot glue gun here too for extra hold.

Step 5:

Using four of the pegs, create a cross by matching the diagonal edges of the end of the peg together. They will fit naturally. Glue together with a hot glue gun.

Step 6:

In the gaps of the cross, glue in another peg, creating a star wand. Spray paint and leave to dry. Wave around and watch pretend magic happen!

I'm not sure how long it will last, but it's fun for now. So much fun that Immy had to take it on our walk the other day after I took these pictures. It was getting late and cold so she quickly winterised her outfit (below). Ha!